In this article, we will see how to install MySql in the Ubuntu machine.
MySql can be installed in linux based machines through the terminal window
- Execute the command “sudo apt-get install mysql-server mysql-client” from the terminal. The below-given picture is for reference.

- You will be asked to enter the machine password here. Give the password and press enter so that the installation will start.
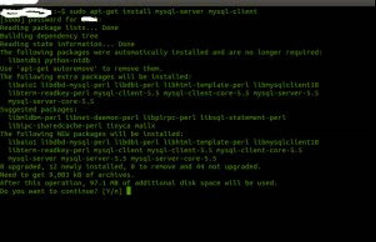
- It will stop and ask you to enter Y/N to proceed. Press Y and hit enter to proceed.
- Now the installation will continue and you can see the process in the terminal window.

- Once the installation is done it will ask you to create a password for the root(default) user of MySQL. For our convenience just give the password “root” and press enter.

- Now you can log into MySQL using “mysql -u root -proot”. Now you will be able to see the command window of MySQL.
